Welcome to the Week Day Home where I potter around making, baking, quilting and creating. And sometimes I wonder what cows would look like doing yoga. So I made some from polymer clay to find out.
I don't usually decorate the front of my christmas card envelopes but I had these rather nice kraft envelopes which I thought needed a subtle jooshing-up. I didn't want to glitter-to-the-max but I wanted a proper wintery theme to reflect Yule and the winter Solstice as well as Christmas. These stamps from Card-io fitted the requirement perfectly and you don't need a lot of "stuff". Something sparkly, a white and a black ink pad and you're good to go.
If you decide to do something similar, don't forget to leave space in the middle for the address and another top right for the stamp! It's easy to get carried away.
Here's the video so you can see what I did and I hope this inspires you. Enjoy!
A few weeks ago I bought some Starlights paints from Inspiration Crafts which are beautiful and perfect for projects such as this. They cover well and shimmer as the light catches them. I no longer need to buy specialised base card, I can just paint what I need. So for example in the video you'll see I punched the leaves around the flower from card stock painted with a white starlights paint. It doesn't show so clearly in the pictures below but in real life those leaves really shine out.
These are two notebooks I was asked to create for a friend's two small daughters. My brief was "make it pink and make it glittery!". I like pink and in moderation I like glitter but I rarely put the two together. But the brief set off an association of ideas and the picture I had in my head was a confusion of fairy tale princesses such as Sleeping Beauty and Snow White in a garden. It all made sense when I started planning these books around the idea of flowers and faded roses. I know my flowers don't look much like roses but I'm no gardener ;) I also wanted a "clean" look so white was always going to play a strong role.
In this video I am working on the two books at the same time but I've edited so you see the process for only one book.
In fact, these are not completely finished. I will add some little personal details for the girls later and because I know these are for christmas gifts, will pop some little doo dads in the pocket at the end of the book. It will balance the inside of the books...
Enjoy the video - and if you feel inspired, visit my You Tube Channel (Attic Lane) and give me a thumbs up. :)
I seem to have a bat thing going on at the moment. I love this Thinlets Mixed Media Die from Tim Holtz and for this project have used the tiny bats as the flowers in a spooky bouquet. They don't look exactly like flowers but I rejected the idea of positioning them back to back to be more flower like because they lost their bat shapes. The video at the end of the photo's shows you how I did it. Enjoy :)
I saw this small metal stencil used on some You Tube videos and having tracked it down, bought one. It's by Stampendous and is called "Picasso". I've had a good old mess about with it and really like the wave shapes and curves. They're the shapes I'm not good at!
I grabbed a piece of card and started playing and didn't stop. It turned into a Zentangle inspired background but it needed something simple on top. So I cut some pink flowers, matted them on some darker pink which matched the pink mat on the back of the whole card. I made some massive dots for the centre of the flowers using some fabby nuvo cystals which dome beautifully and dry hard and voila! I enjoyed it so much, I made two!
Doodle any shapes you like in the spaces and if you want inspiration, google "Zentangle" and you'll find loads of ideas.
Below you can see the lovely dome of the Nuvo Crystals.
This book was a commission and it grew out of a tag I shared on my blog www.weekdayhome.blogspot.co.uk. I've called it the Book of Layers because as you will see it is made of loads and loads of layers! The antiquing creams used are designed to be applied, dried and wiped back to expose the colours below. If you then seal that layer, it will protect your work below and you can continue adding colours and wiping back.
The end effect is one of a book looking aged and worn. It's hard to remember this is just card.
All the details of how to make the layers and the paints, creams and waxes used are listed in the video below. Enjoy :)
I'm not sure what material this imagined Gentleman's Journal was originally made of. It could have had a protective metal cover which has rusted away with time or it could have been a soft, moulded leather. You may see other possibilities in it but the history I've given it is that of an abandoned notebook found in an old, decaying, dusty library. It may contain dark secrets, lovers notes or it may be unused. We'll never know....
And here's what it started life as. Enjoy the video of transformation below:)
Here are two things I love, the Nordic Embossing folders from Crafters Companion and a stamp from the same range. I'm starting to use embossing folders more because of the opportunities they give for adding texture and depth. Normally I prefer to start from scratch with that sort of thing but as the variety of folders becomes more interesting - I'm interested!
Can you see the stars twinkling? I can do glitter when appropriate :)
This card is one of those projects you finish and place somewhere so it stays in your range of vision. Even a few weeks on from when I made it, it still makes me smile. It's a very happy card. There is as always a video to show how to make it but I want to draw your attention to the little houses below. See under the roof tops how it's got some very light grey shadow? Do this. It makes a surprising difference.
This is the project I promised myself I'd do to make use of the lovely blue background tag from an earlier blog post.
I started with this tag base made with a mix of 4 Paperarts Fresco Paints, blobbed onto the tag and spread out using a palette knife. It's a nice technique and makes clearing up afterwards much easier because you just wipe the palette knife with a baby wipe. Lazy crafting :)
The very short video below shows you how I made it. Enjoy :)
This is a very quick little tag I made using some the the lovely Fresco Paints from Paperartsy, a cut out tree I found as an SVG file for the Brother Scan and Cut (although I would have used a bare tree branch stamp if I'd had one) and some Nuvo gold paste through a leafy stencil. The idea was to focus on creating a background using a palette knife instead of a brush to apply paint.
In this tag I blobbed 4 different colours of paint directly onto the card including one very light and one quite dark to give range and depth. You can mix it up as much as you like but the less you move it around, the more "blocky" the paint will appear. In the first sample below, I used the same colours as above but worked them a little more.
These samples use different colours just to show you the varying effects you can get.
I love that blue and silver. I need to use that in a project!!
Here's the video showing my twirly palette knife style....Enjoy!
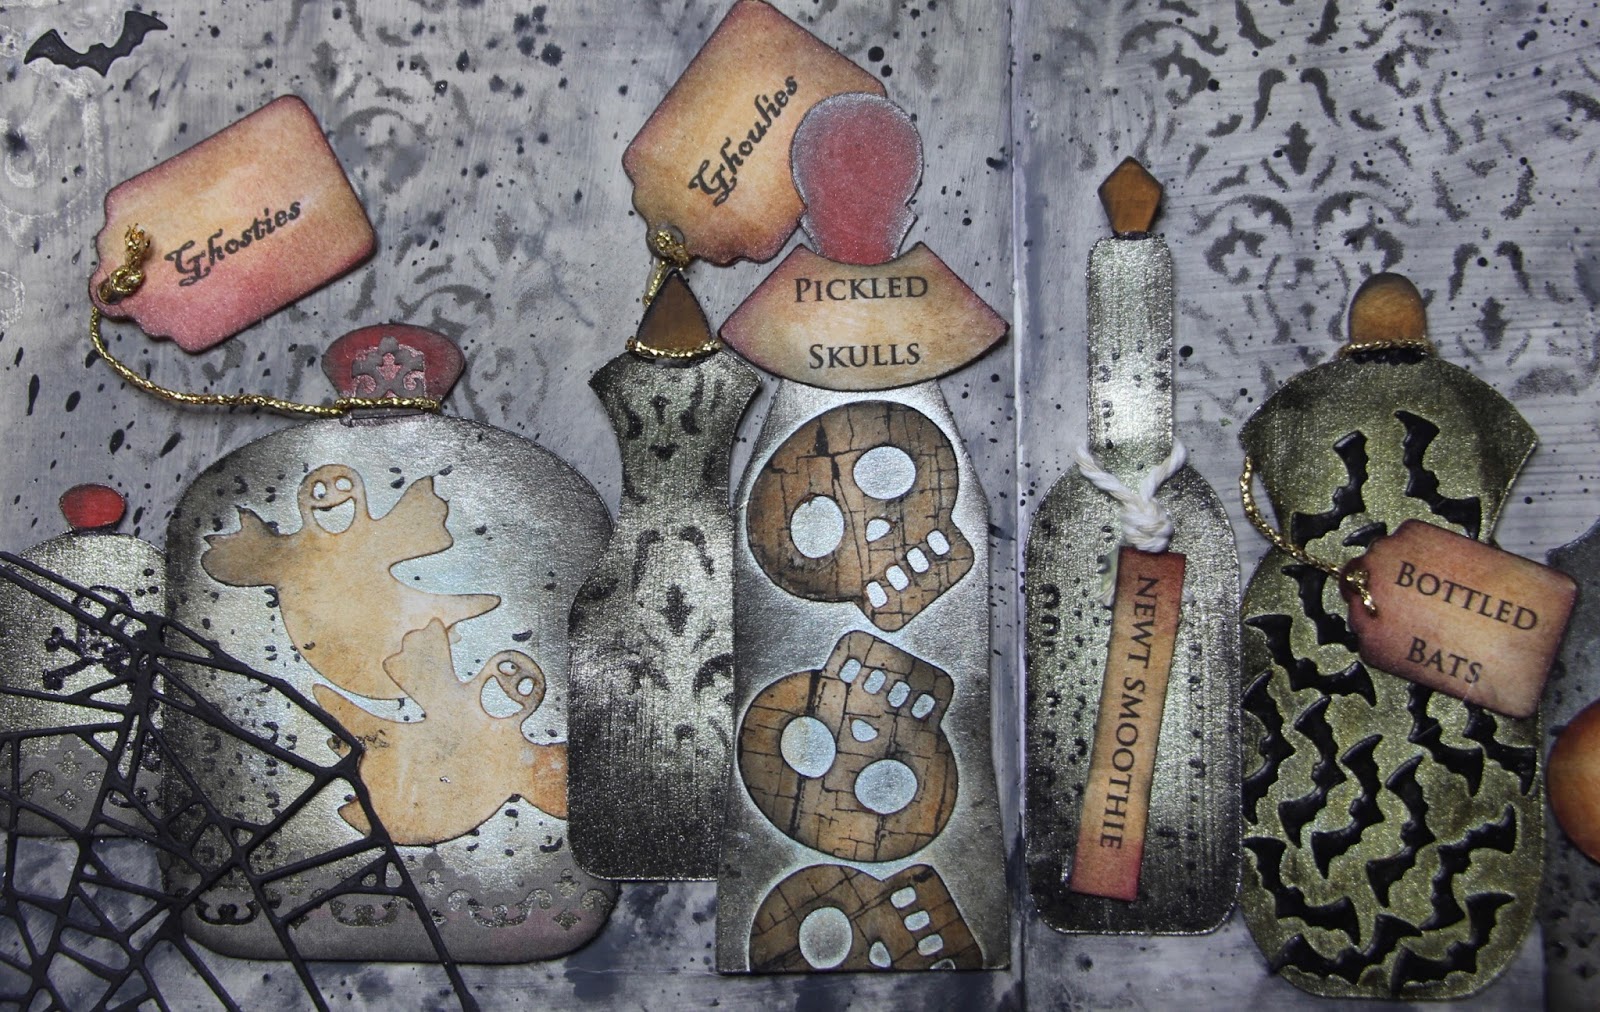
In this mixed media page I'm tapping into the imagery I associate with mad professors in underground laboratories. Too specific? Perhaps. I think the result has a Victorian feel to it, perhaps due to the effect of the black ornate stencilling in the centre of the background. I used a wide range of techniques here including die cutting, stamping, stencilling, resist, hand drawn bottles etc. It also took half the weekend to finish, one of my longest projects but it's always rewarding when you translate the picture in your head to a completed piece so it was worth it. I've updated this page as a result of a request for a copy of my bottles used on this page and you'll find them with a couple of labels at the end of this post.
The paints used for the bottles are from a range by Imagination Crafts called Starlights and they provided exactly the glow I wanted from the bottles. When first applied, I was worried it was too bright but once I'd inked the edges of the bottles it gave the perfect effect!
The glow effect shows up especially well in the bottle of Pickled Skulls, making it appear luminous.
I trimmed this video as much as I thought I could get away with while still showing all the techniques used. Grab a cuppa and enjoy the video :)
On my You Tube channel (Attic Lane) one of my visitors there asked if I had my bottles available as a pdf. I don't but I've had a pootle about on the PC and managed to make the bottles a jpg. I'm more than happy to share (and I hope the file below works as a simple copy and paste) but if you use them anywhere please credit and link back to my blog please. :)
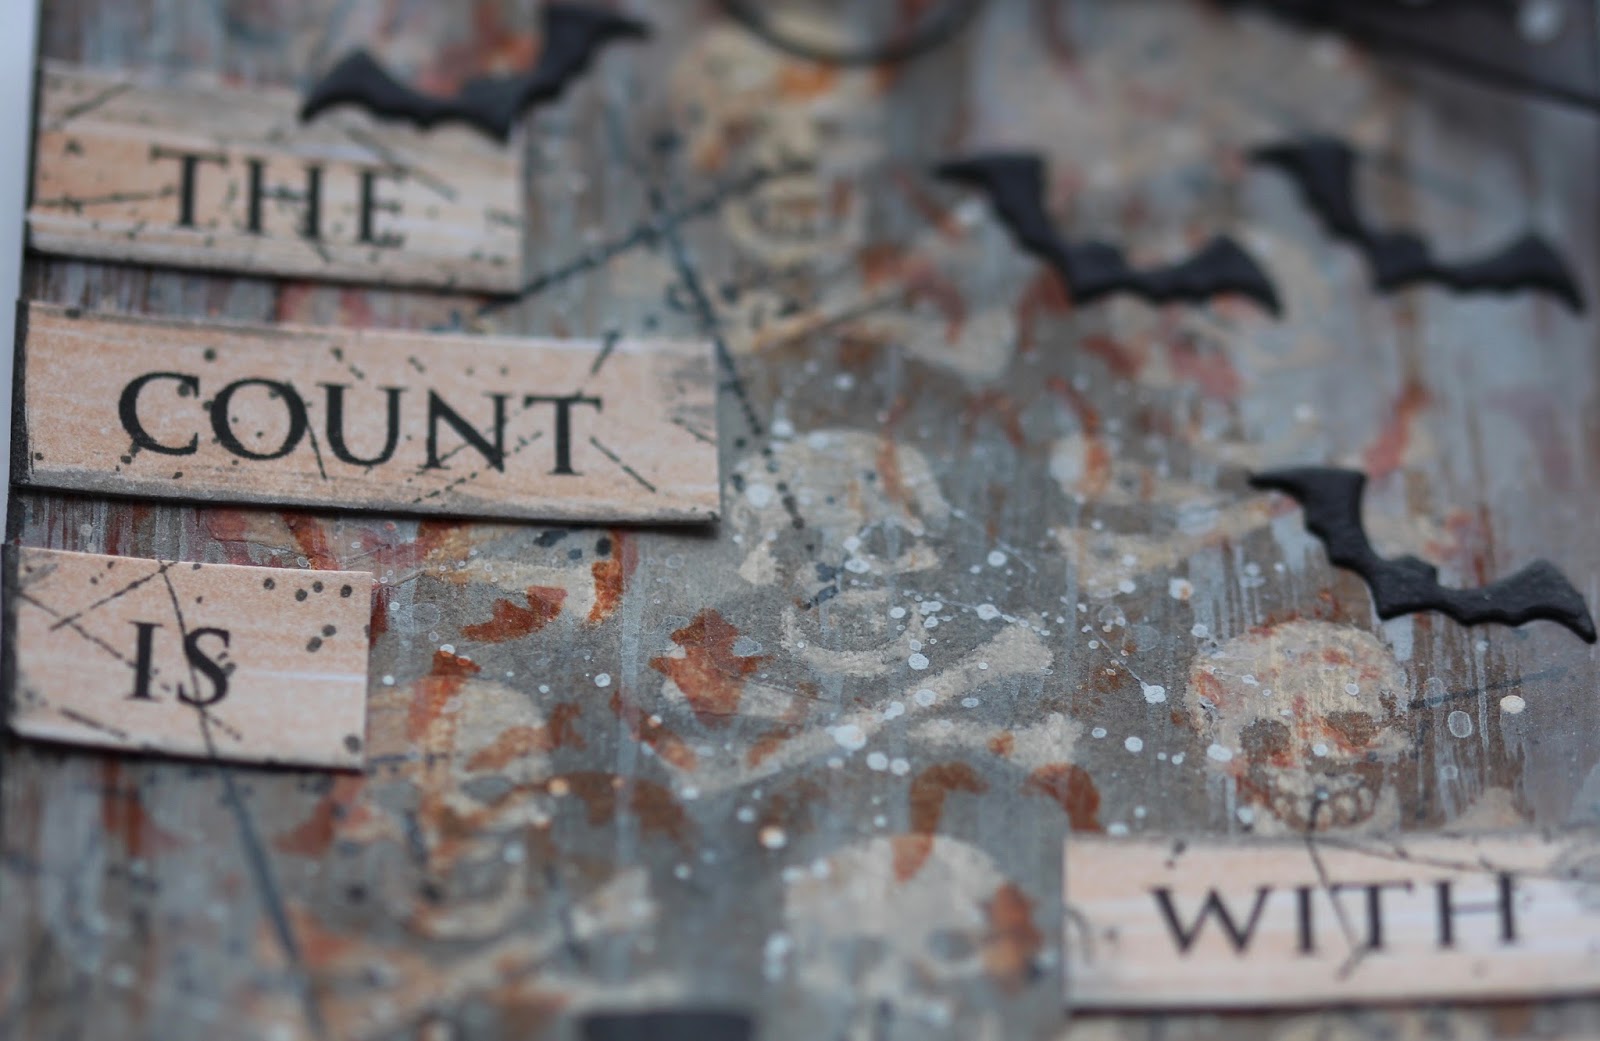
I like working on projects which reflect the colours and seasons when they're created. This tag evokes that creepy feeling you sometimes get walking down a dimly lit road and hearing other unseen footsteps. It's the time of year when the clocks have moved back an hour to allow more daylight in the mornings but those dark early evenings feel quite spooky until you adjust to the winter clock.
My favourite thing about this piece is the background of skulls, created by using Deco Page glue as a resist through a stencil. What's great about this glue is that it dries properly dry and doesn't remain tacky.
I have to apologise for using two stamps which are no longer available. Both the iron fence and the Count himself are stamps from Waltzing Mouse which is sadly no longer trading. I'd suggest finding a clip art image of a cloaked figure, printing it on card and cutting round it. I try not to use things I know you can't get any longer but I have very few Halloweeny stamps on principal (because I don't like the way this old festival to respect and remember our ancestors has been re-branded as Pumpkin-Fest) and I wanted to get some use out of those I do have.
I am, however, fond of a bat, me. We see lots of bats flitting about in the autumn twilight skies and they are fascinating. The speed at which they swoop around is amazing and our observations have taught us that they appreciate a spot of light which lets them see the insects and bugs they are looking for and that they fly around in ovals so if you missed it first time, it'll be back in a minute in roughly the same place.
Some years ago I blogged about a couple of Andy Skinner workshops I went to and learned some seriously cool dry brush techniques and ways to make things look very aged. Andy popped up again on a crafting channel recently and it prompted me to dig out the Deco Art paints I bought 4 years ago (they were still completely fine) and brush up (geddit!) on my techniques. Oh my, how much I've re-learned.
Andy's take on mixed media is that it's about building up layers and making the piece look as if it's had years of paint applied - sometimes looking as if it's been stripped back before another coat is applied. He is a master of making cardboard look like heavy, rusty metal and uses a lot of browns and red in his work. In this tag I used his techniques but in different colours.
The texture and background in this piece are of greater importance than the embellishments. It's technique rich and I think the overall look of faded opulence works beautifully in these colours.